ems electrode placement chart pdf

EMS devices utilize controlled electrical impulses to stimulate muscle contractions, mirroring natural exercise. Proper electrode pad placement is crucial for maximizing activation and ensuring safe, effective results, as detailed in guides like the TENS Electrode Placement Chart.
What is EMS and How Does it Work?
Electrical Muscle Stimulation (EMS) employs controlled electrical impulses to directly stimulate muscle contractions. Unlike voluntary exercise, EMS bypasses the brain, sending signals directly to the nerves controlling muscles. This technology mimics the body’s natural muscle activation process, inducing contractions that can help with muscle strengthening, recovery, and rehabilitation.
Devices like the Vital Flex Core utilize this military-grade EMS technology to target specific muscle groups, notably the core. The impulses cause muscles to contract and relax, effectively toning and tightening without traditional exercises like crunches. Understanding how EMS works is fundamental to optimizing its benefits, and resources like an ems electrode placement chart pdf are vital for correct application.
Importance of Correct Electrode Placement
Precise electrode placement is paramount for maximizing the effectiveness of EMS therapy. Incorrect positioning can lead to uneven muscle activation, reduced results, and potential discomfort. A well-defined electrode pad placement guide, often found as a pdf, illustrates the optimal locations for targeting specific muscle groups, like those detailed for the Vital Flex Core.
Following a chart ensures the electrical impulses reach the intended muscles, promoting efficient contractions. Proper placement also minimizes the risk of skin irritation and ensures a comfortable experience. Resources like the TENS Electrode Placement Chart emphasize the importance of alignment for both pain relief and muscle stimulation, highlighting the need for accurate application.
Understanding Electrode Types
EMS devices utilize various electrode types, including self-adhesive pads and those requiring conductive gel, each impacting application and effectiveness, as shown in placement guides.
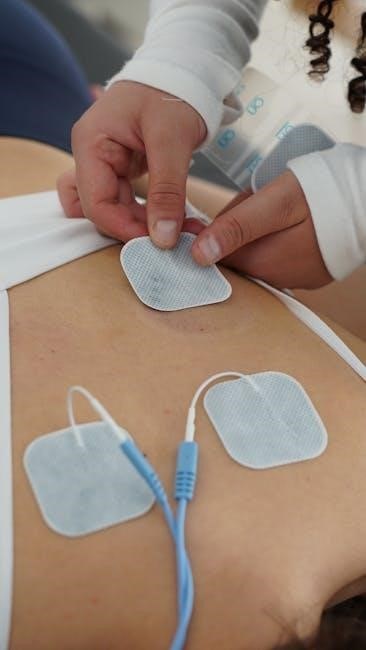
Self-Adhesive Electrodes
Self-adhesive electrodes are a popular choice for EMS due to their convenience and ease of use. These electrodes feature a gel-like adhesive backing that securely attaches to the skin, facilitating effective muscle stimulation.
However, maintaining optimal conductivity is key. The TENS Electrode Placement Chart user manual emphasizes proper skin preparation and regular replacement of these pads, as the adhesive loses its stickiness and the gel dries out with repeated use.
Proper skin care, as outlined in related guides, is vital to prevent irritation. These electrodes are ideal for home use and are frequently utilized with devices like the Vital Flex Core EMS Stimulator, offering a user-friendly experience for toning and tightening.
Conductive Gel Electrodes
Conductive gel electrodes require a separate conductive gel to establish a connection between the electrode and the skin. While requiring a bit more preparation than self-adhesive electrodes, they often offer a stronger and more consistent electrical signal.
These electrodes are reusable, making them a cost-effective option in the long run, but necessitate careful cleaning and storage to maintain their functionality. The TENS Electrode Placement Chart doesn’t specifically detail gel electrode use, but emphasizes the importance of good skin contact for all electrode types.
They are frequently used in professional settings and can be beneficial when targeting specific muscle groups, potentially enhancing the effectiveness of devices like the Vital Flex Core for muscle growth and fat burning.

General Guidelines for Electrode Placement

Optimal conductivity requires thorough skin preparation, and proper electrode spacing and angle are vital for effective muscle stimulation, as outlined in placement guides.
Skin Preparation for Optimal Conductivity
Effective EMS therapy hinges on ensuring excellent electrical contact. Before applying electrodes, the skin must be thoroughly cleaned to remove oils, dirt, and lotions – residues that impede conductivity. A simple wipe with water or a specialized skin prep solution is often sufficient.

Dry skin significantly reduces signal transmission, potentially requiring higher intensity levels and diminishing the therapeutic effect. Conversely, excessively moist skin can also cause issues. The TENS Electrode Placement Chart user manual emphasizes the importance of a clean, dry surface.
For individuals with excessive hair, light trimming in the electrode application area may be necessary to improve adhesion and contact. Remember, proper skin preparation isn’t merely about comfort; it’s fundamental to maximizing the benefits of EMS.
Electrode Spacing and Angle
Optimal electrode placement isn’t just about where you put the pads, but how you position them. Generally, maintaining a distance of 1-2 inches between electrodes is recommended, though this varies based on muscle size and depth. The TENS Electrode Placement Chart often illustrates ideal spacing for different muscle groups.
Electrode angle also plays a vital role. Placing electrodes parallel to the muscle fibers typically provides a broader stimulation, while angling them across the fibers can create a more focused contraction. Experimentation, within safe limits, can help determine the most effective configuration for individual needs.
Avoid overlapping electrodes unless specifically instructed, as this can concentrate the current and potentially cause discomfort. Consistent spacing and angle contribute to balanced muscle activation and a more comfortable EMS experience.
Specific Muscle Group Placement Charts
Detailed charts, like those found in a TENS Electrode Placement Chart PDF, illustrate precise pad locations for targeting specific areas – abdominals, back, legs, and arms – for optimal results.
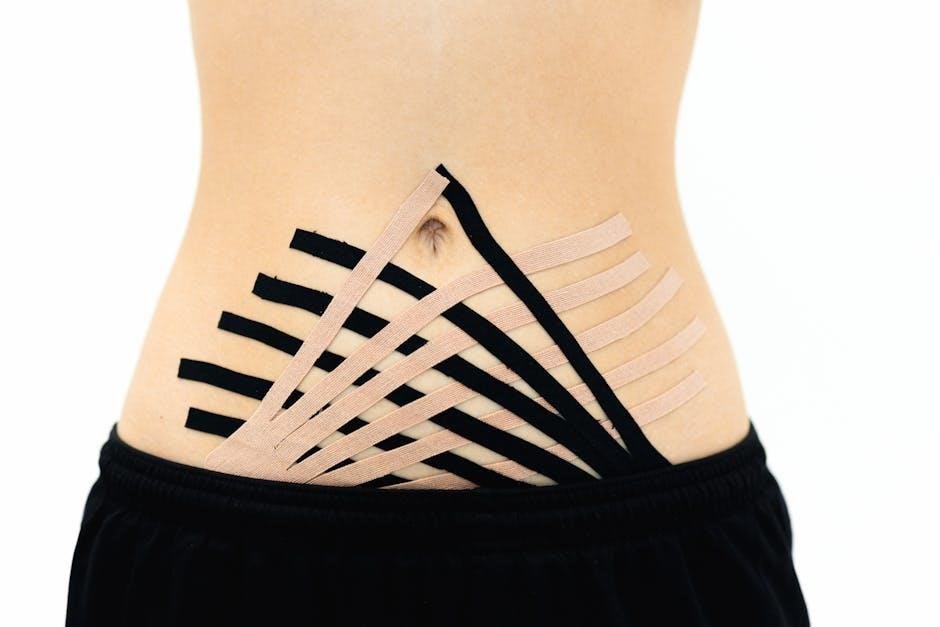
Abdominal Muscle Placement
Effective abdominal stimulation with EMS requires strategic electrode placement, often detailed within a comprehensive ems electrode placement chart pdf. Generally, two to four electrodes are utilized. For overall abdominal engagement, position pairs on each side of the rectus abdominis muscle – one above the navel and one below.
Alternatively, for targeting the obliques, angle the electrodes slightly outwards. The Vital Flex Core, a popular EMS device, benefits from precise pad placement as outlined in its user manual, emphasizing core tightening and toning. Proper placement ensures maximum muscle fiber recruitment, leading to visible results without traditional exercises. Always refer to a reliable chart for optimal positioning and safety.
Back Muscle Placement
EMS for back muscles, as illustrated in many ems electrode placement chart pdf guides, typically involves placing electrodes along the erector spinae muscles – running vertically along the spine. Two to four electrodes are common, positioned bilaterally to encourage symmetrical muscle contraction.
For lower back support, focus placement on the lumbar region. To target the upper back and improve posture, position electrodes between the shoulder blades. Remember that skin preparation, detailed in user manuals, is vital for conductivity. The Vital Flex Core technology, while primarily for the core, demonstrates the broader principle of targeted EMS – precise placement yields optimal results. Always consult a chart for safe and effective application.
Leg Muscle Placement
EMS leg muscle stimulation, as shown in comprehensive ems electrode placement chart pdf resources, varies depending on the targeted muscle group. For quadriceps, electrodes are typically placed on the front of the thigh, flanking the muscle belly. Hamstring targeting requires placement on the back of the thigh.
Calf muscle stimulation involves electrode placement on the gastrocnemius and soleus muscles. Often, two electrodes per muscle group are recommended for balanced contraction. Proper skin preparation, a key element detailed in guides, ensures optimal conductivity. Like the Vital Flex Core’s focused core stimulation, precise leg electrode placement maximizes effectiveness. Always refer to a detailed chart for correct positioning and intensity levels.
Arm Muscle Placement
EMS arm muscle stimulation, guided by a detailed ems electrode placement chart pdf, focuses on biceps, triceps, and forearm muscles. For biceps, electrodes are generally applied on the front of the upper arm, aligned with the muscle’s length. Triceps stimulation requires placement on the back of the upper arm.
Forearm muscle targeting involves electrode placement along the flexor and extensor compartments. Similar to Vital Flex Core’s targeted approach, precise placement is vital. Two electrodes per muscle group are often advised for even contraction. Remember that proper skin preparation, as outlined in user manuals, enhances conductivity. Always consult a chart for correct positioning and intensity settings to maximize results and prevent discomfort;

Vital Flex Core EMS Placement
Vital Flex Core utilizes EMS technology for core muscle stimulation; a detailed ems electrode placement chart pdf guides users for optimal toning, tightening, and strengthening results.
Vital Flex Core: Targeted Core Stimulation
Vital Flex Core employs advanced Electrical Muscle Stimulation (EMS), a technology originally developed for military applications, to deliver focused contractions to your core muscles. This innovative approach allows for effective toning, tightening, and strengthening without the need for traditional exercises like crunches or planks.
The device’s effectiveness hinges on precise electrode placement, and a comprehensive ems electrode placement chart pdf is essential for maximizing results. This chart details the optimal positioning of the pads to target specific core muscle groups, ensuring efficient and impactful stimulation. Utilizing the correct placement, as outlined in the guide, allows users to achieve visible results and experience the benefits of a strengthened core from the comfort of their homes.
Specific Pad Placement for Vital Flex Core
Optimal results with the Vital Flex Core depend heavily on adhering to the ems electrode placement chart pdf guidelines. Typically, pads are positioned on the rectus abdominis – the “six-pack” muscle – and the obliques, located on the sides of the abdomen. The chart illustrates precise locations for each pad, ensuring complete muscle fiber recruitment.
For comprehensive core engagement, the placement chart pdf often recommends a symmetrical arrangement. Correct spacing and angle, as detailed in the guide, are vital for even stimulation. Users should consult the chart to understand variations in placement based on individual anatomy and desired intensity. Following these instructions maximizes the device’s potential for toning, tightening, and strengthening the core muscles effectively.
Troubleshooting Common Placement Issues
Refer to the ems electrode placement chart pdf to verify correct positioning if experiencing issues. Improper placement can lead to weak contractions or skin discomfort.
Lack of Muscle Contraction
If you’re experiencing a lack of muscle contraction during EMS use, the first step is to consult your ems electrode placement chart pdf. Incorrect pad positioning is a primary cause, hindering effective stimulation. Ensure the electrodes are firmly adhered to clean, dry skin, following the recommended spacing and angles for the targeted muscle group.
Verify the device is powered on and the intensity is gradually increased to a comfortable, yet effective level. Check electrode integrity; worn or damaged pads lose conductivity. Also, confirm the battery is adequately charged. If issues persist after verifying these points, re-examine the placement chart and consider repositioning the electrodes, ensuring proper muscle fiber alignment for optimal results.
Skin Irritation and Discomfort
Skin irritation and discomfort are potential side effects of EMS, often linked to improper electrode application. Refer to your ems electrode placement chart pdf for guidance on correct placement and spacing to minimize friction. Always prepare the skin thoroughly – clean and dry it before applying electrodes. Individuals with sensitive skin may benefit from hypoallergenic electrode options.
If irritation occurs, immediately reduce the intensity or pause the session. Ensure electrodes aren’t placed over broken skin, rashes, or inflamed areas. Proper cleaning and storage of electrodes, as outlined in user manuals, prevents bacterial buildup. Discontinue use and consult a healthcare professional if irritation persists or worsens, despite following recommended guidelines.

Safety Precautions
Always consult the ems electrode placement chart pdf for contraindications before use. Proper electrode care—cleaning and storage—is vital for preventing skin issues and ensuring device longevity.

Contraindications for EMS Use
Crucially, the ems electrode placement chart pdf will outline situations where EMS is not recommended. Do not use EMS if you have a pacemaker, implanted defibrillator, or other electronic medical devices. Avoid use during pregnancy, or if you have epilepsy, heart disease, or active cancer.
Never apply electrodes over broken skin, varicose veins, or areas with reduced sensation. Individuals with deep vein thrombosis (DVT) should also avoid EMS. Consult your physician before using EMS if you have any underlying medical conditions or are taking medications. Ignoring these contraindications can lead to serious health risks, emphasizing the importance of carefully reviewing the provided documentation before initiating EMS therapy.
Proper Cleaning and Storage of Electrodes
The ems electrode placement chart pdf often includes vital care instructions. Regular cleaning extends electrode lifespan and maintains conductivity. After each use, gently wipe electrodes with a damp cloth and mild soap – avoid harsh chemicals or abrasives.
Allow electrodes to air dry completely before storing. Reattach protective liners to maintain adhesiveness. Store in a cool, dry place, away from direct sunlight and extreme temperatures. Proper storage prevents premature degradation of the adhesive and conductive gel, ensuring optimal performance and cost-effectiveness. Following these guidelines maximizes electrode usability and hygiene.
Confused about where to put your EMS electrodes? We’ve got you covered! Download our easy-to-follow electrode placement chart PDF & maximize your workout.